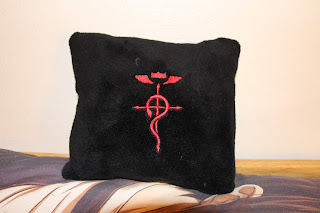
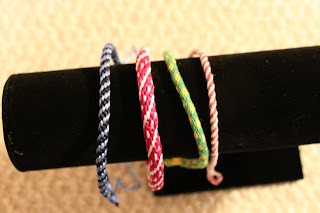
Sorry for the fact that the blog hasn't been active for awhile, guys. I've been busy with school and whatnot. However, since Fanime *finally* released the applications for artist alley, updating the crafts gallery soon!
Next to Crafty
Blog under reconstruction! I will be posting the tutorials that I promised, please be patient with me :)
Thursday, March 27, 2014
Wednesday, April 24, 2013
Tuesday, April 23, 2013
Ririchiyo's scarf (youkai form): part 1
So for this year, I want to make a costume of Ririchiyo from Inu x Boku.
I haven't read the manga but I love the anime, and Ririchiyo is just SOOO CUTE!!
This is my version of the scarf of Ririchiyo's youkai form, and how I made the pattern and construct the scarf step by step.
Step 1: Draw the pattern
Instruments I used:
- cardstock paper
- pencil
- eraser
- sharpie
- circle template (a compass or anything to draw different size circles would work)
I started off by drawing different sized circles overlapping from the middle left edge of the paper all the way to the top right corner. Then I traced the part of circles that I want and connect them into one line. I also drew some sakura flowers by combining 5 circles. I was going for a flame/blood feel to the pattern so I added some small circles along my line.
I changed the designs around a bit, and once I was satisfied with my design, I traced everything over with a sharpie/permanent marker.
The butterfly was also done by drawing circles and connecting them. I think the faster way is to just google a butterfly silhouette, print it out, cut it, and glue it on to the pattern. (I didn't because I was bored out of my mind and got nothing better to do xD)
After the pattern is done, just connect the two.
Step 2: making the stencil
Instruments:
- sharpie
- exacto knife
- tape
- ruler
- acetate film/stencil film/etc.
- your pattern
Trace the pattern onto the film. Make sure the paper and film are taped down to your work area or else the film might slip.
Cut the stencil with an exacto knife.
Step 3: Painting the pattern on the fabric
Instruments&Materials:
- paint brush & palette
- Crimson Red fabric paint
- Easy-Tack repositionable adhesive
- Black Satin Fabric 13x72in 2 pieces
- (its more cost efficient to buy 1 yard and connect the pieces. I want it to be one long piece instead of two pieces together so I bought 2 yards, if you're a tall person, you prabably need to buy more than 2 yards)
- Stencil
- Newspaper/paper bag/ paper towel/etc.
- anything to cover your floor because the paint might seep through the fabric so it'll get messy.
- spray the back side of the stencil with the repositionable adhesive and let it dry for the amount of time stated on the direction. (check with a small piece of your fabric first to make sure the adhesive will not ruin your fabric.)
- while the adhesive is drying, iron your fabric and cut it into the desired length x 13 inches. (for me its 72in x 13in)
- stick the stencil onto the right side of the fabric( the side you want people to see.
- paint the pattern onto both end of the fabric
- remove stencil, and let the paint dry for the required amount of time stated by the paint's directions. The paint I used says 72 hours, so I'm gonna let it sit for 3 days before I sew the 2 pieces together.
Friday, April 5, 2013
Saturday, March 23, 2013
Ferrero Rocher Flower Bouquet
Today is my brother's last show in high school. I promised him that I'll bring him flowers. I already bought a bouquet at Lucky's earlier this morning, but I feel like giving him something special. So I got a box of Ferrero Rocher and hot glue them to wires. I wrapped each chocolate in tissue paper and clear plastic bags that I cut in half. They turned out prettier than I expected. :D
Materials:
Box of 12 Ferrero Rocher Chocolate
wires
clear plastic gift bags
tissue paper
hot glue
Saturday, March 16, 2013
Emoticon Pillow
I walked to Joann fabric store then other day with this 50% off coupon and I fell in love with this fabric called "Soft N Comfy Fabric". True to its name, the fabric is super soft, and super comfy. Its so nice and comfy that I want to have my whole bed made of the stuff so I can fall on it and never get up. Of course, I can't afford to do so since they're $14.99/yard, and it's just too costly for me to cover my entire bed with it. I probably look pretty creepy in the store touching, feeling, poking the fabric for at least 15 min, until I made up my mind to get 1/2 a yard to make a pillow. Even though I can't have a bed, I can have a pillow.
Materials:
Soft N Comfy Fabric
my new embroidery machine (hehehe... its so awesome)
Materials:
Soft N Comfy Fabric
my new embroidery machine (hehehe... its so awesome)
Subscribe to:
Comments (Atom)


